When I started producing my YouTube videos with binaural beats, I had to acquire the knowledge and skills to create these beats myself. At that time, there were limited resources available online, and I wanted to create custom frequencies with specific durations for my projects. This is a step-by-step guide on how to create binaural beats using Audacity, a free application that is compatible with both Windows and Mac operating systems. Additionally, Audacity offers various plugins that enhance its user-friendliness. If you haven't downloaded Audacity yet, you can get it from the manufacturer's website.
Binaural beats can be used for various purposes and have been found helpful for learning, meditation, and even boosting creativity. Without going into too much detail, binaural beats are an acoustic illusion that occurs when two different frequencies are played simultaneously in each ear. The goal is to align the current state of brain waves with the frequency produced by the binaural beats. So, what does this mean? Let's say your mind is in a very active or stressed state, which typically shows up as numerous alpha or beta waves on an EEG. However, by using binaural beats, it is possible to lower your brainwave state and achieve a more relaxed mental state.
Step 1: Download Audacity
If you don’t have Audacity yet, you can download it here. If you’re unfamiliar with Audacity: it’s a user-friendly audio editor that’s available for free and will be our tool of choice for creating binaural beats.
Step 2: Set the Base Frequency
The first task is to generate a base frequency (usually between 100 and 200 Hz, depending on the desired wave effect). Navigate to the "Generate" tab and select "Tone."
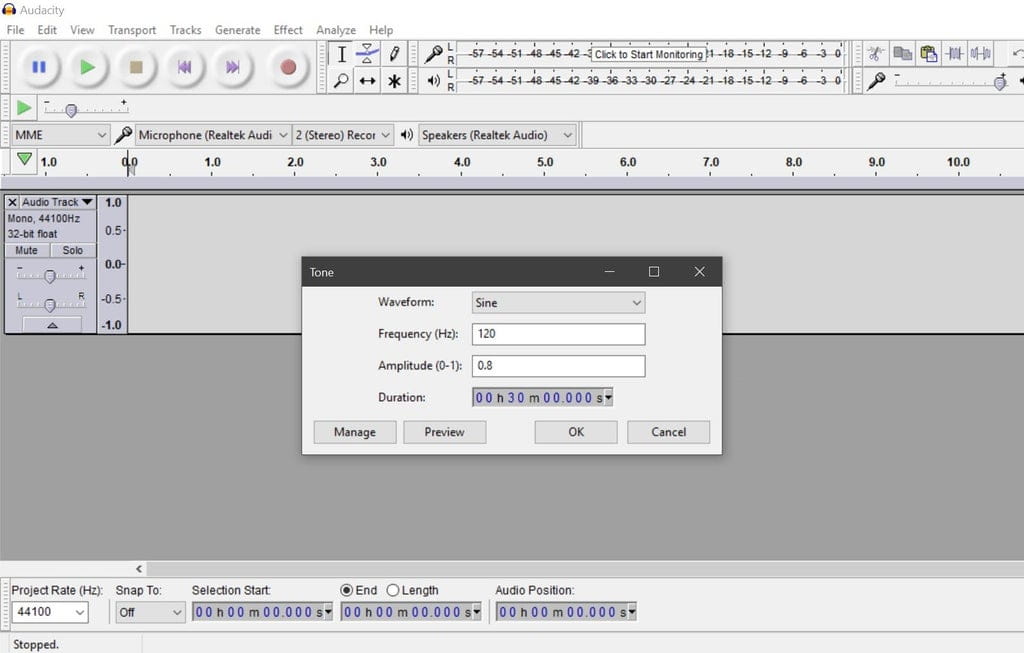
Generate the Base Tone
Enter the desired frequency and duration into the corresponding fields. Make sure the remaining options match the preset image.
Step 3: Create the Left Stereo Channel
For the binaural beats to work effectively, it’s important to separate the left and right audio channels. First, click on the dropdown arrow at the beginning of the newly created audio track and then select "Left Channel."
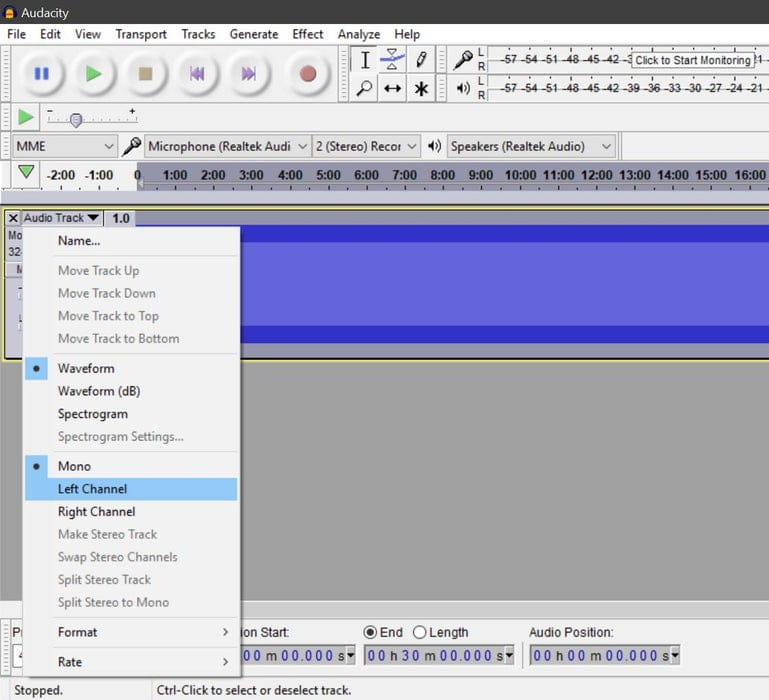
Create the Left Stereo Channel
*Please note that with older versions of Audacity, you can achieve the same result by setting the L–R control for each tone to one side.
Step 4: Generate the Second Tone
Repeat the previous step, but this time set the frequency either higher or lower than the base tone. Before generating the second tone, ensure that you deselect the first audio track by clicking away from it. You should see a second audio track grayed out before selecting "Ok."
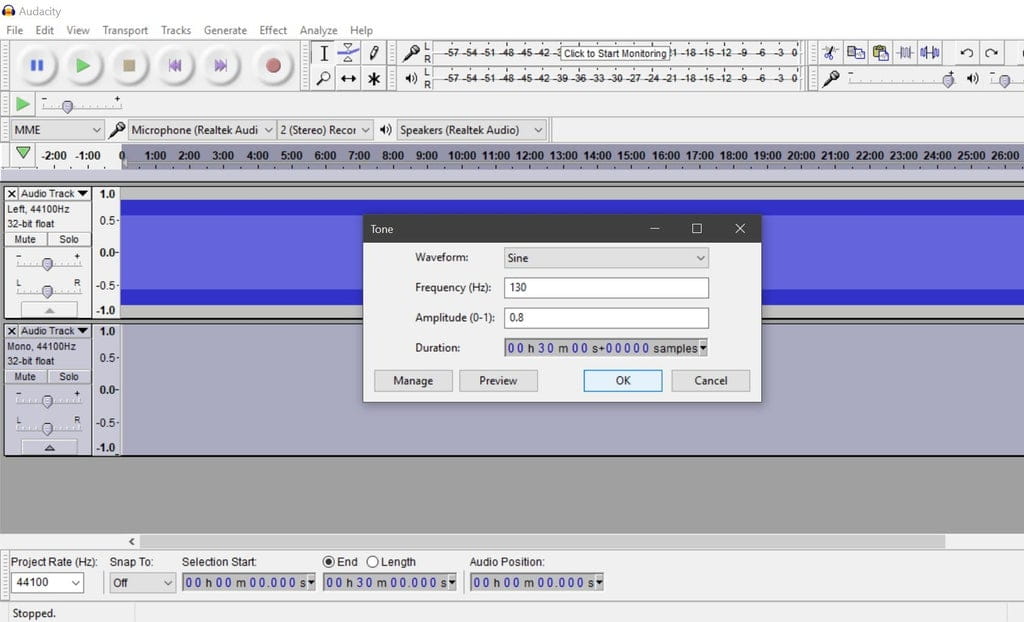
Generate the Second Tone
Step 5: Create the Right Stereo Channel
Follow the instructions from Step 3 again, but this time choose "Right Channel" instead of left.
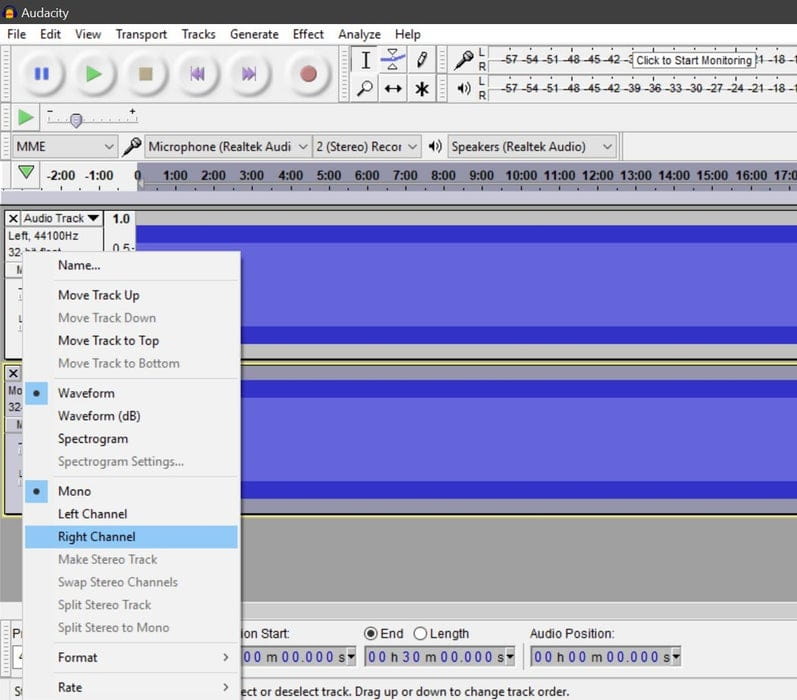
Create the Right Stereo Track
Step 6: Finalize and Export
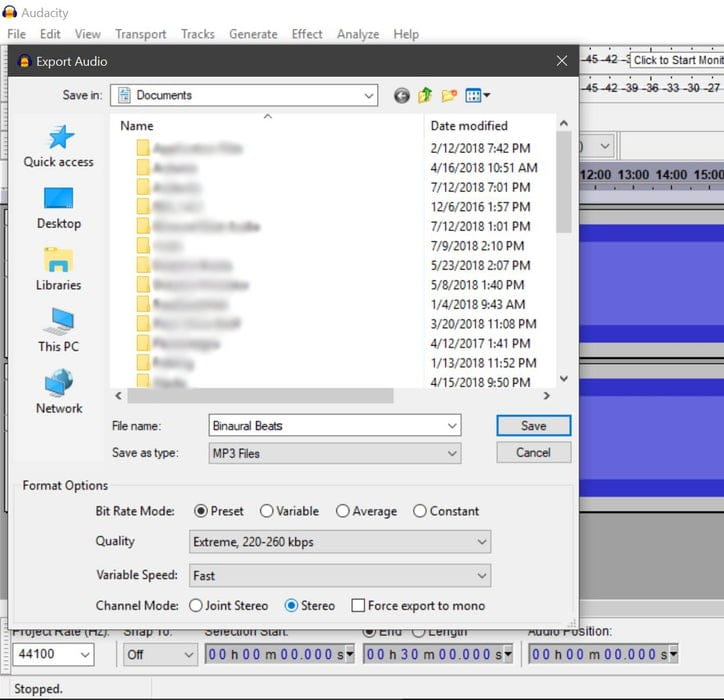
To complete the process and convert the file into an mp3 format, go to File -> Export Audio and give the file a name. Choose your desired audio quality and ensure that the channel mode is set to "Stereo" rather than "Joint Stereo." Additionally, I’ve attached a video where I used the audio file from Audacity so you can experience the intended sound.
